The Ultimate Guide #1 to Calla Lily Propagation: Start from the Flower for a Thriving Garden
Introduction to Cala Lily and Propagation
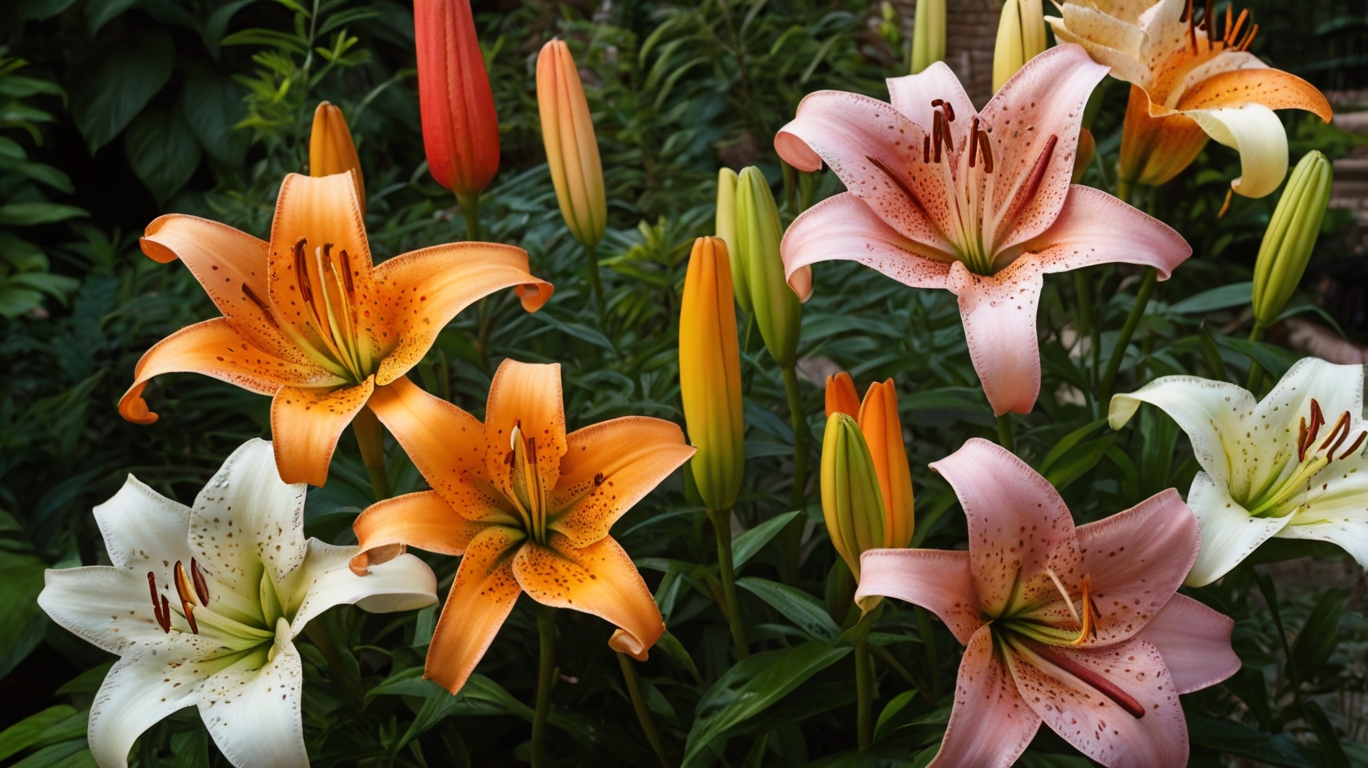
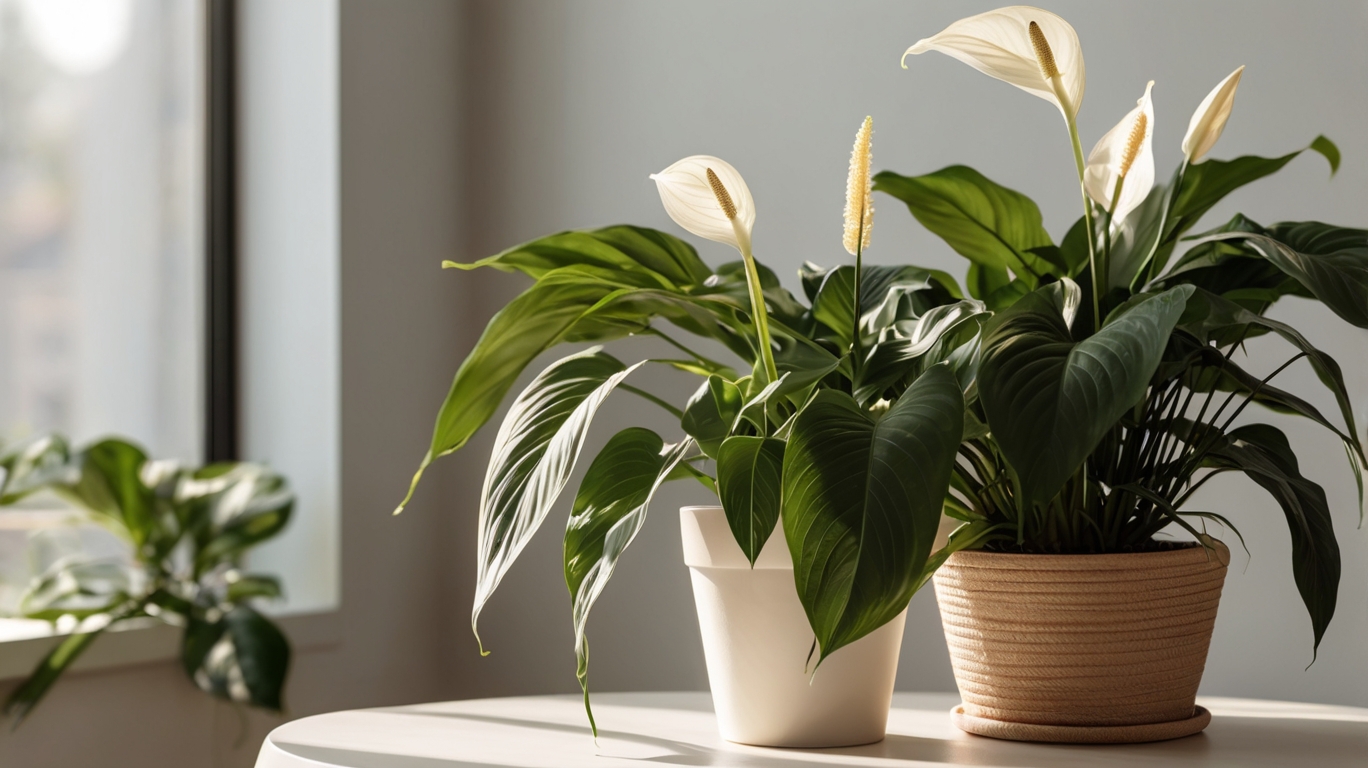
Calla lily, known botanically as Zantedeschia, are elegant flowering plants celebrated for their unique trumpet-shaped blooms and vibrant colors. Native to Southern Africa, these perennials thrive in a wide range of environments due to their adaptability and hardy nature. Gardeners prize them for their ornamental value in gardens, floral arrangements, and indoor decorations. While their structure resembles a single flower, Calla lily feature a spadix surrounded by a beautiful, petal-like spathe, making them distinct among flowering plants.
Propagation is a key horticultural practice that allows gardeners to reproduce plants. In the case of calla lily, propagation refers to multiplying plants through vegetative or seed-based methods. Calla lilies primarily grow from rhizomes, thick underground stems that store nutrients essential for growth and reproduction. These rhizomes make propagation straightforward for enthusiasts seeking to expand their collection.
There are two common approaches to propagating calla lily: dividing rhizomes and starting plants from seeds. Rhizome division is the favored technique for most because it yields faster results and ensures the new plants are genetically identical to the parent. Seed propagation, though less common, offers the potential for creating unique hybrids but requires more patience and care due to its lengthy growth process.
Proper timing is crucial for successful propagation of calla lily. Tests have shown that rhizome division is best undertaken during the plant’s dormant phase, typically in late autumn or early winter. This ensures better recovery and robust blooms in the next growing season. Both methods require careful attention to detail, such as choosing healthy parent plants and maintaining optimal conditions during growth.

Understanding Calla Lily Anatomy: Flowers, Bulbs, and Roots
The anatomy of the calla lily is a fascinating blend of elegance and functionality, crucial for understanding its propagation. Each part, from the flower to the bulb and roots, carries out specific roles that support the plant’s growth and reproduction processes.
Flowers: The Visual Spotlight
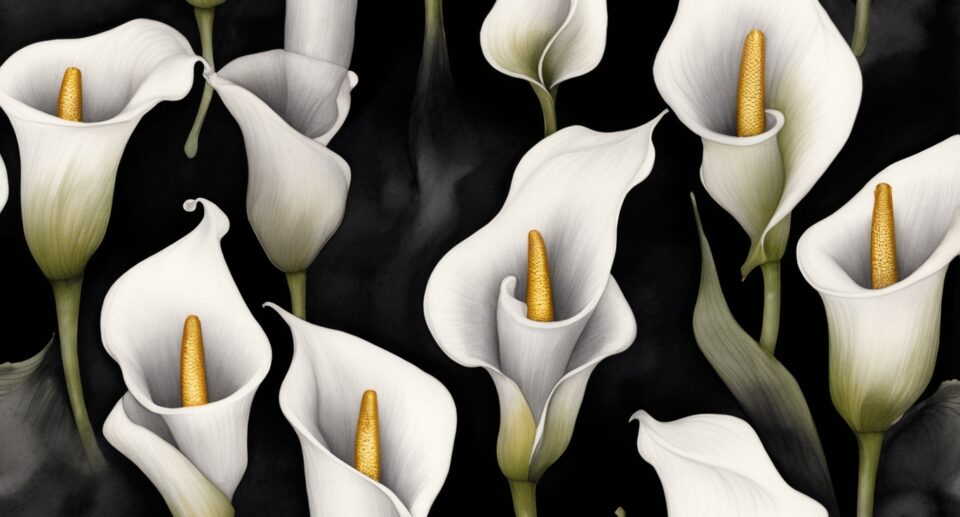
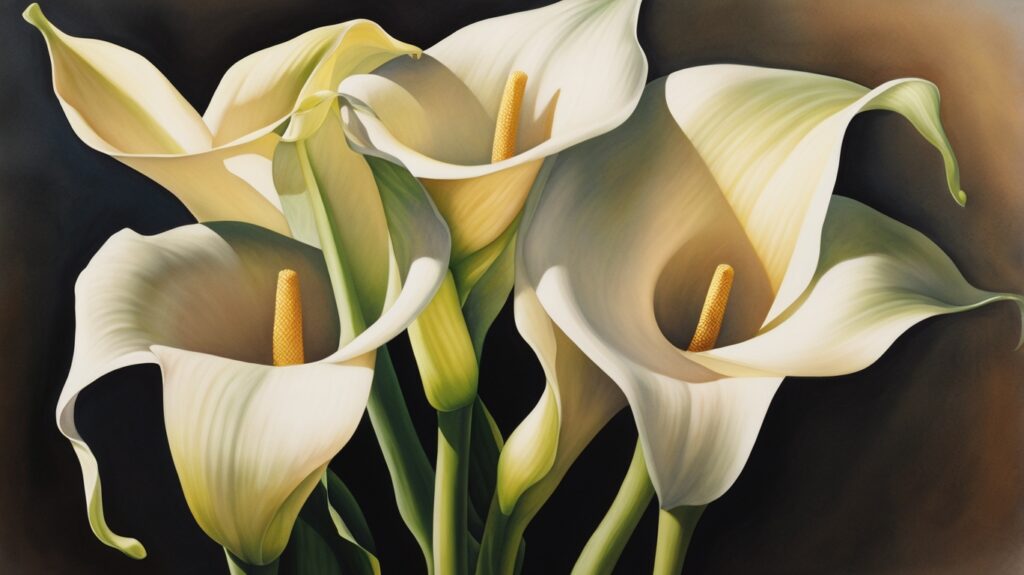
Calla lily flowers, often admired for their beauty, are technically not true flowers in the traditional sense. What appears as a single bloom is actually a modified leaf structure called the spathe, which envelopes the spadix, a central stalk covered in tiny, densely packed flowers. The spathe, typically white, pink, or yellow, serves as a visually attractive feature to draw pollinators, while the smaller flowers on the spadix play the reproductive role. Pollination occurs when insects transfer pollen between male and female florets on the spadix.
Bulbs: The Storage Powerhouses
Calla lily grow from rhizomes rather than true bulbs, although they are often referred to interchangeably due to similarity in function. These underground structures act as storage units for nutrients, allowing the plant to survive periods of dormancy or unfavorable growing conditions. Rhizomes are the primary means of vegetative reproduction. New shoots can emerge from these swollen stems, making them key for propagation purposes. Healthy, disease-free rhizomes are essential for successful propagation.
Roots: Anchors and Lifelines
Calla lily roots serve a dual purpose: anchoring the plant firmly in the soil and facilitating the absorption of water and nutrients needed for its survival. These fibrous, spreading roots play a critical role in supporting the rhizome and above-ground plant structures. Proper root development ensures stable growth and the transport of resources to the spathe for vibrancy. Careful attention to soil health and moisture levels fosters robust root health.
Understanding the interplay between these three vital components allows gardeners to approach propagation with more precision and success.
Can You Propagate Calla Lily from Flowers?
Calla lily (Zantedeschia spp.) are prized for their elegant and stunning blooms, but propagation through their flowers is not a typical or reliable method for reproduction. Unlike some plants, calla lilies do not produce seeds within their flowers that are immediately viable. While the flowers may eventually produce seed pods, propagation from seeds is usually slow and challenging compared to other techniques. Understanding the role of flowers in their lifecycle is crucial to exploring practical propagation methods.
Calla lily flowers are primarily involved in reproduction through pollination. In controlled environments, gardeners may collect pollen from flowers and hand-pollinate other blooms to encourage seed development. The process requires patience, as it can take several weeks for seed pods to mature. Once harvested, seeds must be carefully cleaned and planted in well-draining soil, with germination taking several months or even a year. However, this method is not generally recommended for beginners, as it produces inconsistent results and can take years for the plant to mature enough to bloom.
Commercially and among home gardeners, calla lily are most often propagated through their rhizomes or tubers, which yield faster and more dependable results. Unlike seed-based propagation from flowers, rhizome division allows the plant to retain its genetic traits, ensuring that the new plants will resemble the parent. For those seeking a quicker and more manageable option, focusing on rhizomes rather than flowers is typically the preferred approach.
While flowers play a role in the lifecycle of calla lily, they are more ornamental than functional for propagation purposes.
Why Choose Calla Lily Propagation?
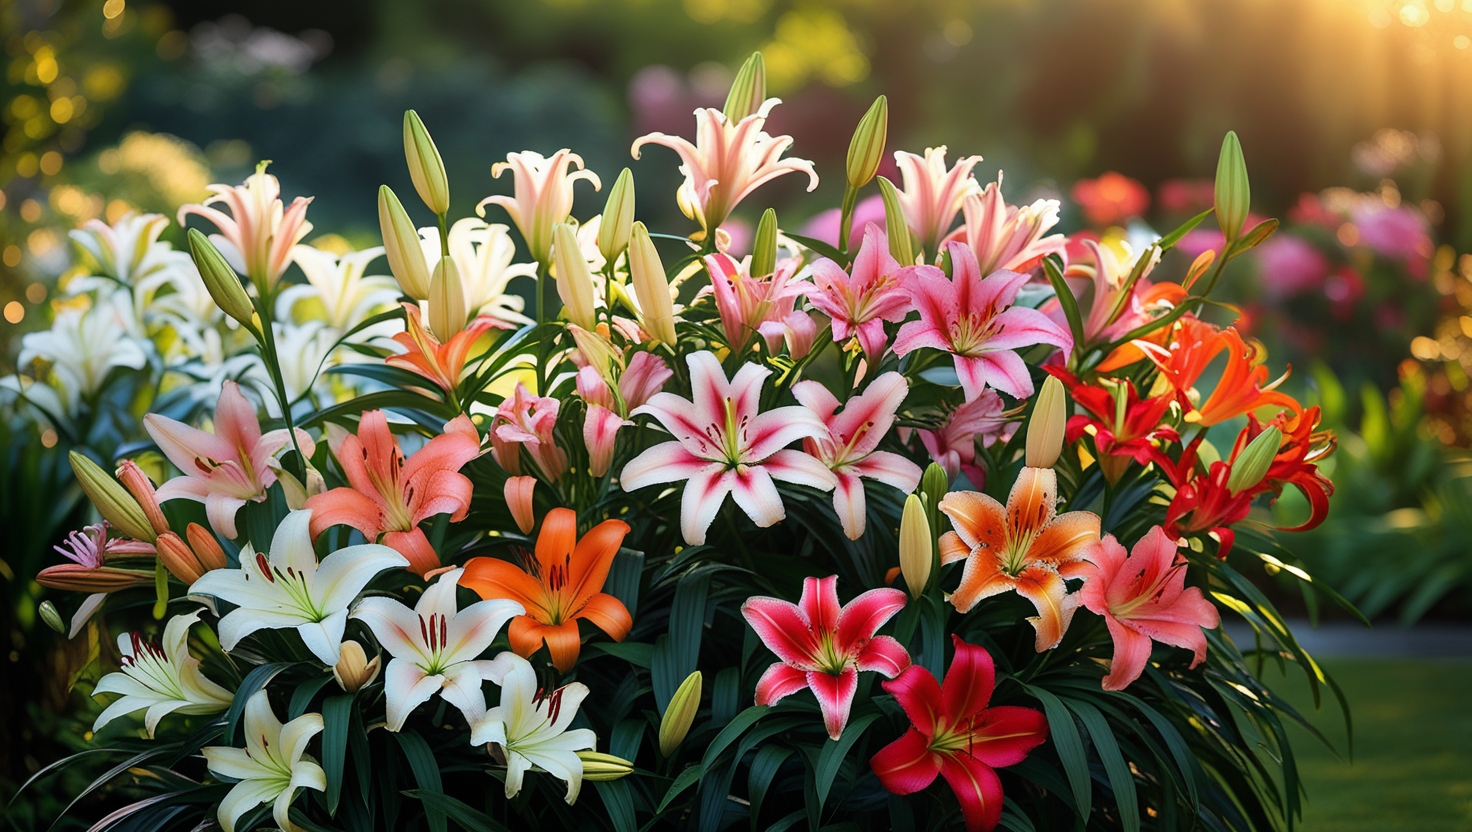
Calla lily propagation offers gardeners and enthusiasts the opportunity to expand their collection of these stunning flowers without purchasing new plants. By reproducing calla lily, individuals can create thriving floral displays tailored to specific preferences, including color variations and garden aesthetics. This option is particularly appealing for those looking to preserve rare or cherished calla varieties that are not easily accessible in nurseries.
The propagation of calla lily is straightforward, making it suitable for both beginners and seasoned horticulturists. The process requires minimal equipment and can be achieved indoors or outdoors, making it highly versatile based on the gardener’s environment. Furthermore, propagating calla lilies allows individuals to experiment with several propagation methods, including using seeds, tubers, or divisions, enhancing one’s gardening skills and knowledge in the process.
Unlike other flowers that might require extensive preparation or specific growing conditions, calla lily are known for their adaptability. They thrive in various climates, ranging from subtropical regions to temperate zones, making them a reliable choice for propagation projects across diverse geographies. Their hardy nature also ensures a higher success rate during propagation compared to more temperamental species.
Another compelling reason to opt for calla lily propagation is its cost-effectiveness. Gardeners can maximize their yield from a single plant without investing in expensive seeds or nursery stock. Once propagated, the plants can be easily managed and maintained, making them a sustainable choice for both indoor and garden settings.
Calla lily also add value beyond their visual appeal. They have symbolic significance, representing purity and elegance across cultures. Propagating them can be a rewarding experience, as it merges the art of nurturing growth with an appreciation for nature’s beauty. These benefits make calla lily propagation an engaging endeavor that aligns with both practicality and aesthetics.
Necessary Tools and Materials for Propagation
To successfully propagate calla lily starting from the flower, preparing the right tools and materials is essential. A thoughtful selection of equipment ensures that the process is efficient and minimizes the risk of damaging the plant or flower. Below is a breakdown of the items needed for successful propagation.
Tools Needed
- Pruning Scissors or Shears: Sharp, clean scissors or shears are critical for making precise cuts without bruising the flower or stem. Sterilizing the tool before use helps prevent the spread of diseases.
- Trowel or Small Garden Shovel: These are needed for gently digging up the bulb or rhizome if propagation involves division further down the line.
- Tweezers or Forceps: Useful for handling delicate flower seeds or small plant parts during germination or planting.
- Watering Can or Spray Bottle: Both are necessary for keeping the soil or propagation medium consistently hydrated without overwatering.
- Gloves: Garden gloves protect the hands from soil contamination and exposure to sap, which can sometimes irritate the skin.
Materials Needed
- High-Quality Potting Soil: Calla lily thrive in soil that is rich in nutrients and drains well. It’s recommended to use a slightly acidic mix with added organic material.
- Propagation Tray or Small Pots: Shallow trays or pots provide a controlled environment for seed germination or rhizome growth.
- Rooting Hormone: Although optional, rooting hormone can improve the chances of successful propagation and speed up root development.
- Clear Plastic Cover or Humidity Dome: These items help retain moisture and maintain a stable temperature while seeds or propagating parts are being established.
- Fertilizer: A balanced fertilizer with a slow-release formula ensures sustained nutrition during the propagation process.
- Labeling Materials: Markers and tags help organize propagated segments or seedlings, particularly in larger projects.
Transitioning into Propagation
The tools and materials listed above collectively streamline the propagation process, offering precision and control at every step. With proper preparation and equipment, propagators can focus on nurturing healthy calla lily from flower to full growth.
Step-by-Step Guide to Propagating Calla Lily
Propagating calla lily is a straightforward process that allows gardeners to cultivate their own plants from existing ones. By following these steps, individuals can ensure a successful propagation journey while maintaining the health and vitality of the plant.
Tools and Materials Needed
- Healthy calla lily plant
- Gardening gloves
- Trowel or spade
- Sharp knife or shears
- Well-draining soil mix
- Containers or pots (if propagating indoors)
- Watering can
Step 1: Choosing the Right Time
Calla lily are best propagated during their dormant season, typically in late summer or early fall. This period ensures the bulbs or rhizomes have enough time to prepare for growth before the next growing season.
Step 2: Identify Propagation Method
Calla lily can be propagated through division. Look for mature plants with multiple offshoots or rhizomes. These structures are ideal for separation and can establish a healthy new plant.
Step 3: Digging Up the Parent Plant
Using a trowel or spade, carefully dig up the calla lily plant. Ensure that the rhizomes remain intact, as damaging these structures can interfere with successful propagation. Shake off excess soil for clear visibility of the rhizome clusters.
Step 4: Separating the Rhizomes
Carefully separate the rhizomes using a sharp knife or shears. Each segment should have healthy roots attached to it. Avoid cutting sections that lack root systems, as they may not develop into thriving plants.
Step 5: Preparing the Soil
Prepare a well-draining soil mixture to provide adequate support for the new plants. Containers with drainage holes work well for indoor propagation, while outdoor propagation requires turning the garden soil for aeration.
Step 6: Planting the Rhizomes
Plant each rhizome in the prepared soil. Ensure they are buried at a depth of 2 to 3 inches. Space the rhizomes adequately to allow room for future growth.
Step 7: Watering and Care
Water the newly planted rhizomes thoroughly. Keep the soil consistently moist but not waterlogged. Place the containers in a location with indirect sunlight or plant outdoors where they can receive partial shade.
Step 8: Monitoring Growth
Monitor the plants regularly for signs of growth. Within weeks, new shoots should emerge from the soil. Maintain a balanced watering routine and ensure optimal conditions for healthy development.
Best Soil Conditions for Calla Lily Growth
Calla lily thrive in well-drained, nutrient-rich soil that supports their optimal growth. The soil’s texture and composition play a crucial role in ensuring the plants receive adequate water and nutrition while preventing root rot and other complications.
Soil Texture and Drainage
Calla lily prefer soil with a loamy texture, which contains a balanced mixture of sand, silt, and clay. Loamy soil allows for good water retention while ensuring proper drainage, preventing pooling that could lead to fungal infections or rot. If the native soil in the planting area tends to retain excess moisture, amending it with coarse sand or organic matter can improve its drainage.
pH Levels and Nutrient Composition
Maintaining slightly acidic to neutral soil pH, ranging between 6.0 and 6.5, is essential for calla lily to absorb nutrients effectively. Test kits available at gardening stores can help determine soil pH and guide necessary adjustments. To enrich the soil’s nutrient profile, compost or well-aged manure can be integrated into the top layer, providing a steady supply of essential nutrients like nitrogen, phosphorus, and potassium.
Soil Amendments and Preparation
For gardeners planning to propagate calla lily, preparing the soil prior to planting ensures the best results. Organic materials such as peat moss, shredded bark, or leaf mold enhance aeration while boosting moisture retention in sandy soils. Conversely, clay-heavy soils require amendments like perlite or vermiculite to prevent compaction and support root health. Turning the soil to loosen it before planting ensures adequate airflow around the roots.
Maintaining Ideal Conditions
Ongoing maintenance is vital to preserve optimal soil conditions for calla lily. Regularly testing soil pH helps prevent nutrient lockout, and periodic fertilization ensures the plants receive the proper blend of minerals. Mulching with organic materials also helps regulate soil temperature and maintain consistent moisture levels, particularly in warmer climates or during dry periods.
Ideal Environment for Nurturing Propagated Calla Lily
Calla Lily thrive in specific environments, and creating the right conditions increases their chances of successful propagation and growth. Understanding their requirements ensures they flourish, showcasing their iconic blooms in full splendor.
Temperature and Climate Preferences
Calla lily prefer warm, temperate climates. They grow best in temperatures ranging between 60–75°F (15–24°C). While they can tolerate mild fluctuations, extreme cold or heat may hinder their development. In areas with colder climates, it is vital to grow them indoors or in greenhouses to mimic their preferred conditions.
Lighting Requirements
Adequate lighting is one of the cornerstone factors in nurturing calla lily. These plants favor bright, indirect sunlight over direct exposure. Too much direct sunlight can scorch their foliage, while insufficient light inhibits proper growth. Position them in locations with filtered sunlight or partial shade to keep their leaves healthy and vibrant.
Soil Characteristics
The composition of soil plays a critical role in supporting propagated calla lily. They thrive in well-draining, nutrient-rich soil with a slightly acidic pH range of 6.0–6.5. Proper drainage is essential to prevent waterlogging, which can lead to root rot. Adding organic matter such as compost or mulch to the soil enhances fertility and water retention, boosting their growth.
Adequate Watering Practices
calla lily require consistent watering to maintain their health, but they should never sit in overly soggy conditions. Keeping the soil moist but not saturated is important. During warmer seasons, watering frequency may increase, while in colder months, reduced watering prevents overhydration. Regular checks ensure appropriate moisture levels.
Humidity Considerations
These plants thrive in environments with moderate humidity levels, ideally ranging between 50%–70%. If grown indoors, using a humidifier or misting occasionally maintains an ideal atmosphere. For outdoor cultivation, natural humidity often suffices, depending on the region.
Protection from Pests and Diseases
Maintaining a healthy environment reduces susceptibility to pests such as aphids and spider mites, which may target young propagated calla lily. Regular inspections and preventative measures, such as applying organic insecticides or removing infested leaves, safeguard their health. It is also essential to monitor for fungal diseases and encourage good ventilation to reduce risks.
Crafting an ideal environment tailored to the unique needs of propagated calla lily strengthens their growth and development. This foundation is crucial for their long-term vigor.
Common Mistakes to Avoid During Propagation
When propagating calla lily, certain errors can impede success or harm the plant’s natural growth. Recognizing and avoiding these common mistakes ensures better results and healthier plants.
1. Overwatering the Root Zone
Excessive watering is a frequent oversight when propagating calla lily. While moisture is essential for rooting, overly wet soil creates waterlogged conditions, which encourage root rot and fungal issues. The propagation medium should be well-draining and kept slightly moist, not soggy.
2. Improper Cutting Techniques
Using dull or unsanitized tools when separating rhizomes or leaf cuttings can lead to poor cuts, which harm the plant and increase the risk of bacterial infections. A sharp, sterile knife or pruning shears should always be used to make clean and precise incisions.
3. Ignoring Dormancy Periods
Calla lily naturally enter a dormancy phase, typically during late fall or winter. Attempting propagation during this period can lead to minimal growth or failed efforts, as the plant’s energy is directed towards resting rather than producing new roots. Timing the propagation process during the active growing season is crucial.
4. Planting at Incorrect Depths
When planting calla lily rhizomes, burying them too deeply within the soil can hinder sprouting. The rhizome’s top should only be about 1-2 inches below the surface to allow proper airflow and light exposure while preventing decay.
5. Skipping Pest and Disease Checks
Neglecting to inspect the plant for pests, such as spider mites or aphids, or existing diseases before propagation can lead to transferring issues to new growth. A thorough examination and treatment of the parent plant should occur before starting the propagation process.
6. Using Poor-Quality Soil
Calla lily thrive in nutrient-rich, well-draining soil. Using impoverished or overly compacted soil during propagation can stunt growth and affect the overall health of the plant. Choosing soil with the right pH balance and adding organic matter ensures an ideal growing environment.
7. Placing the Cutting in Extreme Conditions
Exposing propagated cuttings to direct sunlight, extreme temperatures, or wind during the early stages can damage fragile roots or cause dehydration. Calla lily propagation thrives in a warm, shaded area with consistent, moderate warmth.
Careful planning and attention help avoid these missteps, ensuring successful propagation and growth.
Caring for Your Newly Propagated Calla Lily
Proper care for newly propagated calla lily is essential to ensure their growth and longevity. Once the propagation process is complete, attention should be given to soil, water, light, and other environmental factors to promote healthy development.
Setting Up the Right Environment
- Soil Selection: Choose a well-draining soil rich in organic matter. A mix of peat moss, perlite, and compost is ideal for calla lily, as it balances nutrients and prevents waterlogging.
- Containers or Ground Planting: If growing in containers, ensure they have proper drainage holes to avoid stagnant water. For ground planting, select a location with loose soil that allows for easy root expansion.
Watering Guidelines
- Frequency: Keep the soil consistently moist during the initial growth stage, but avoid overwatering. Saturated soil can lead to root rot, which is detrimental to the plant’s health.
- Watering Technique: Direct water to the base of the plant to prevent fungal diseases on the leaves. Early morning watering allows leaves to dry before nighttime.
Optimal Light Conditions
- calla lily thrive in bright, indirect sunlight. Exposure to a few hours of morning sun followed by partial shade during the afternoon is ideal.
- Protect newly propagated plants from intense, direct sun, which can scorch their tender leaves and impede growth.
Temperature and Humidity Requirements
- calla lily prefer mild temperatures between 60-75°F and should be protected from frost.
- Maintain moderate humidity levels to mimic their native subtropical environment. Using a humidity tray for indoor plants can help create a favorable atmosphere.
Additional Care Tips
- Fertilization: Feed newly propagated calla lily with a balanced, water-soluble fertilizer every 4-6 weeks during the growing season. Ensure the fertilizer is diluted to prevent root burn.
- Pest Management: Watch for common pests, such as aphids or spider mites. Infections can be treated with insecticidal soap or neem oil spray.
Patience and consistent care during the early stages will foster strong, vibrant calla lily that reward with beautiful blooms.
How Long Does a New Calla Lily Take to Mature?
Calla lily are elegant flowering plants that require patience and nurturing to reach their full potential. From propagation, whether through bulbs, rhizomes, or seeds, the time it takes for a calla lily to mature depends on several factors, including the propagation method, growing conditions, and variety of the plant.
Growth Timeline Using Rhizomes or Bulbs
- Emergence Stage: When propagated from rhizomes or bulbs, the calla lily typically begins to show shoots within 2–4 weeks, assuming favorable soil temperature and moisture levels.
- Vegetative Growth: During the next 6–8 weeks, the plant focuses on developing stems and leaves. At this stage, care must be taken to ensure proper sunlight, water, and nutrient levels.
- First Blooms: Mature blooms can be expected approximately 10–12 weeks after planting. However, variations in the type of calla lily and environmental conditions may delay flowering.
Growth Timeline Using Seeds
Propagation through seeds tends to take longer compared to rhizomes or bulbs.
- Germination Phase: Calla lily seeds usually germinate within 2–3 weeks if kept in warm soil with consistent moisture. Germination can vary depending on seed quality and growing conditions.
- Seedling Development: Developing a strong root system and initial foliage from the seedling stage often takes an additional 4–6 weeks.
- Maturity: It may take up to 1–2 years for seed-grown calla lily to flower, as they require extensive growth to establish themselves fully.
Factors Affecting Maturity
Several external factors influence how long a calla lily takes to mature:
- Climate: Warmer temperatures typically accelerate growth, while cooler conditions slow the process.
- Soil Quality: Nutrient-rich, well-draining soil provides optimal support for healthy development.
- Watering: Overwatering or underwatering can hinder plant maturity, while balanced moisture facilitates proper growth.
- Plant Variety: Different calla lily varieties may have slightly varied maturation times. Dwarf varieties might bloom faster, while larger cultivars might take longer.
By understanding these growth stages, gardeners can better plan and care for calla lily, appreciating the time and effort required for their delicate flowering cycle.
Fascinating Facts about Calla Lily Propagation
Calla lily, native to South Africa, are admired worldwide for their elegance and beauty. Their propagation process boasts some intriguing aspects that many gardeners find fascinating.
- Rhizomes as the Core of Propagation: Unlike many flowering plants that rely on seeds, calla lily primarily propagate through their rhizomes, which are underground storage structures. These rhizomes store nutrients and can emerge as new plants when separated and replanted.
- Dormancy Plays a Vital Role: Calla lily go through a dormancy period, especially during their off-season. During this time, the plant replenishes its energy in its rhizomes, preparing it for propagation and the next growth phase.
- Propagation Through Splitting: When dividing rhizomes for propagation, each rhizome section must have at least one healthy bud, as these buds serve as growth points for new plants. This ensures a higher success rate in producing thriving lilies.
- Calla lily Can Self-Sow: Although rare, calla lily flowers can also produce seeds that lead to self-sowing. However, growing calla lily from seeds is a slow and less reliable process compared to rhizome division.
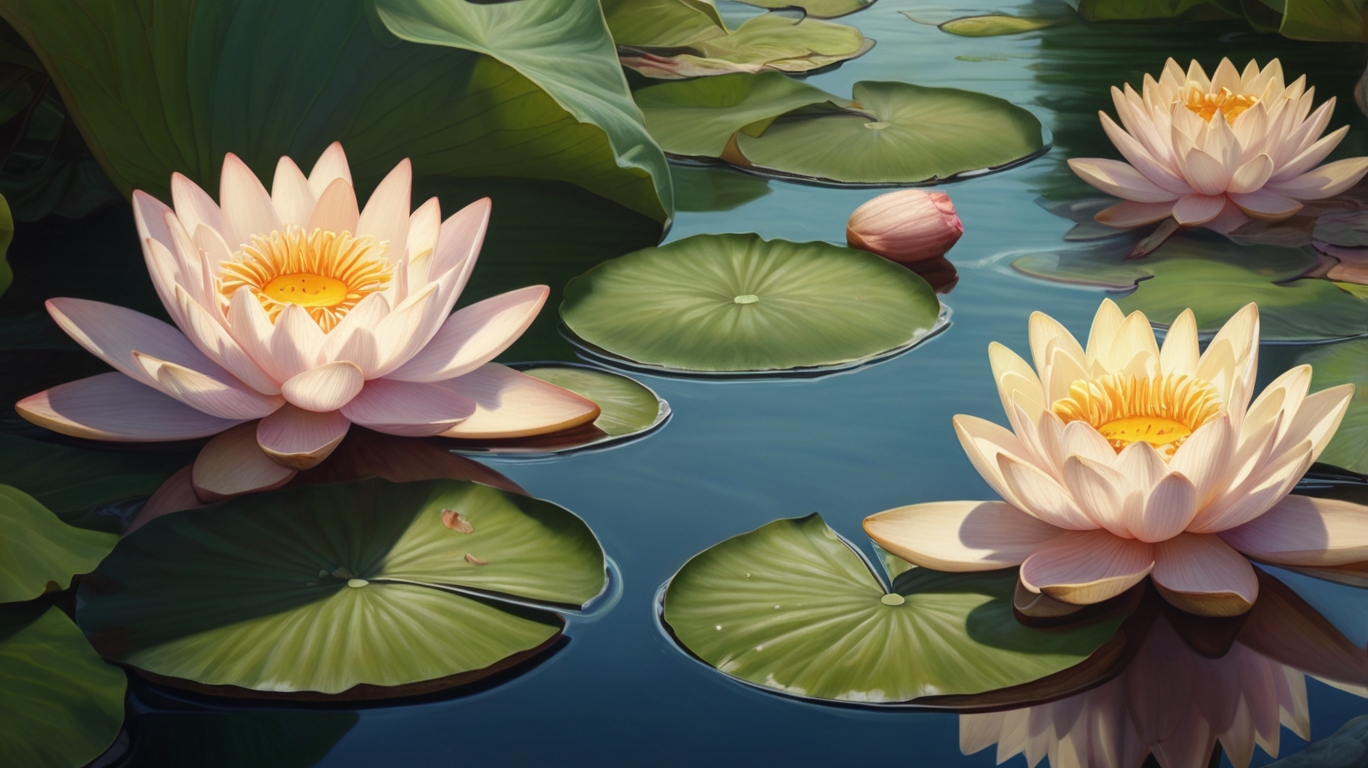
- Adaptability in Growth: These plants can grow in waterlogged soils and are often used in wetland gardens. Factors like soil type, moisture level, and temperature can all influence the propagation success rate.
- Variety of Colors Through Propagation: Many of the lush colors in cultivated calla lily are hybrid varieties achieved through selective propagation of rhizomes. This allows gardeners to experiment and retain specific hues.
Understanding these lesser-known aspects of calla lily propagation gives gardeners deeper insight into cultivating these stunning plants, ensuring robust growth and breathtaking blooms.
Frequently Asked Questions About Calla Lily Propagation
Can Calla Lily Be Grown from Seeds?
Yes, Calla lily can be grown from seeds, but it is not the most common method of propagation. Growing from seeds requires time, patience, and proper environmental conditions. Seeds should be harvested from mature seed pods, cleaned, and planted in nutrient-rich soil. However, this method is unpredictable and may not result in plants identical to the parent.
What Is the Easiest Way to Propagate Calla Lily?
The easiest and most reliable way to propagate calla lily is through division. This involves separating the rhizomes or tubers, which are the underground stems of the plant. Divided rhizomes should be replanted in fresh soil, ensuring they are planted with the shoots facing up. Division is preferred since it ensures the offspring retain the parent plant’s characteristics.
When Is the Best Time to Propagate Calla Lily?
The best time to propagate calla lily is in the fall after the foliage has died back, or in early spring before new growth begins. During these periods, the plant is in its dormant state, making it easier to divide the rhizomes without stressing the plant. This timing also allows new divisions to establish themselves before the active growing season.
How Long Does It Take for Calla Lily to Grow After Propagation?
After propagation, calla lily typically take 2 to 3 weeks to sprout when propagated by rhizomes. Seed propagation may take up to several months due to the slower germination process. Growth speed depends on factors such as light, temperature, and soil conditions.
What Care Is Needed for Propagated Calla Lily?
Propagated calla lily require loose, well-drained soil with moderate moisture. They should be placed in a location with partial to full sunlight, depending on the variety. Fertilization every few weeks during the growth phase can enhance their vigor. Regular inspection for pests and diseases is also critical to ensure healthy growth.
Conclusion: Successfully Propagating Calla lily at Home
Successfully propagating calla lily at home depends on understanding their unique growth requirements and following practical propagation techniques. These elegant, trumpet-shaped flowers can be propagated through division or rhizome planting, offering multiple opportunities for gardeners to grow and expand their collection.
The division method involves carefully separating dense clumps of roots during transplantation. This approach works exceptionally well during their dormant period, ensuring minimized stress on the plant and encouraging healthy growth post-propagation. When handling rhizomes, cleanliness is crucial to prevent the introduction of diseases or pests. Using sterilized tools and ensuring that the rhizome sections retain adequate tuber volume safeguard future growth.
In addition, gardeners must mimic the natural conditions of calla lily to spur growth after propagation. This includes selecting slightly acidic, well-draining soil enriched with organic matter and maintaining consistent moisture levels without waterlogging. Pairing these efforts with indirect sunlight exposure ensures the plants thrive while developing new foliage and flowers.
Maintaining proper care during the propagation process is vital. Regular monitoring for signs of pests like aphids or fungi promotes optimal plant health. Mulching around the base of calla lily can improve soil structure while helping retain moisture. Fertilization schedules should align with seasonal requirements, supporting root expansion and flower production.
Patience is essential, as calla lily often take months before showcasing their brilliant blooms. Over time, with careful propagation and nurturing, these flowers can add beauty and sophistication to home gardens or indoor spaces, becoming a rewarding endeavor for any enthusiast.
Click the link below to buy “FLOWER Retro Wooden Stand Plant Terrarium with 3 Bulb Glass Vases for Hydroponic Home & Office Décor”